![]()
In this post, I’ll be showing you how to make pixel art for the math classroom using Google Sheets™. You do need a free Google account to access Google Sheets.
Click here to grab the free pixel art printable guide with extra details and pictures!
1. Get your spreadsheet ready
Start by opening a new Google Sheets spreadsheet at docs.google.com/spreadsheets
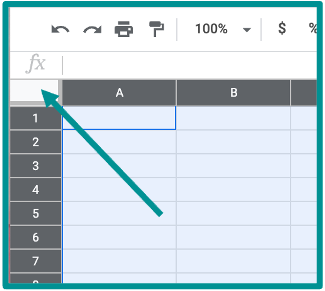
Next, change all the cells to “pixel size”. Click the grey cell to the left of column A to select all the cells. Then click between A and B and drag to the left. You want all the cells to be small and square.
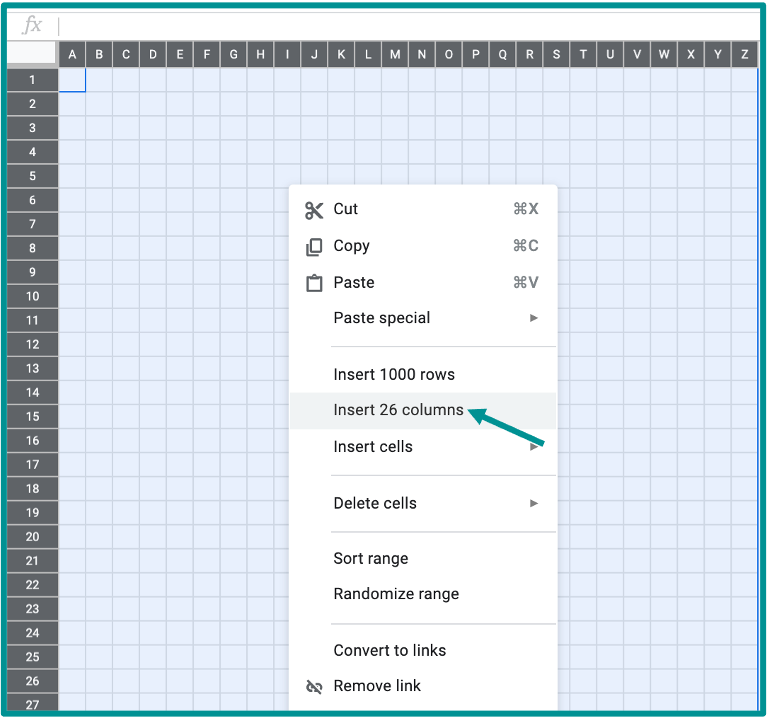
While the cells are still highlighted, right click on the cells and select “Insert 26 columns”. This will add more pixels to your sheet. Do this once more for a full sheet.
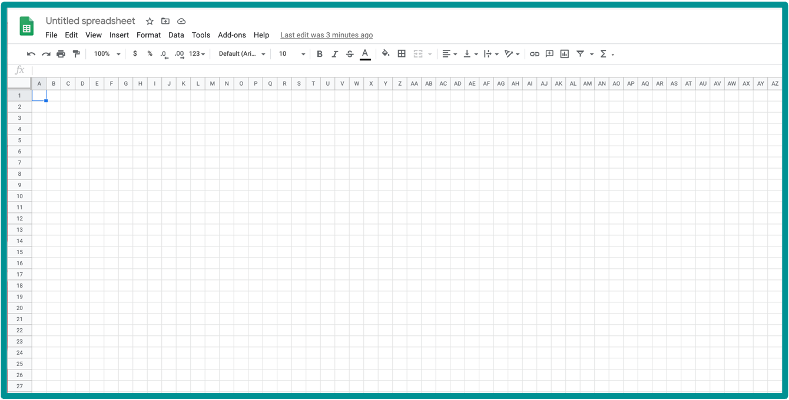
Your spreadsheet should now look like the picture below.
2. Add sections
Next, you want to add sections for directions, questions, answers, and the pixel art.
You can merge cells together to create more space for typing. Feel free to format the text however you want. I like bold, big text. I also use text wrapping and center alignment.
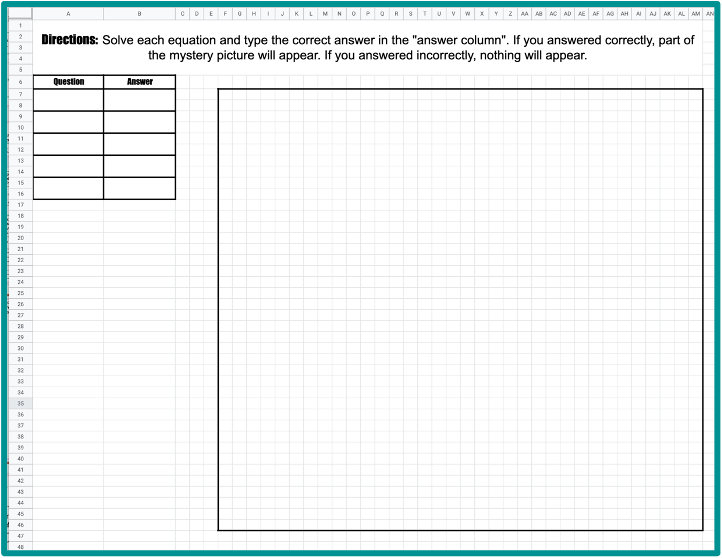
Add as many questions as you want. I like to put a border around the question/answer columns and the pixel art box.
PRO TIP: Before you start drawing the pixel art, I would make a copy of your entire spreadsheet and save it as “Pixel Art Template”. That way, you don’t have to repeat all these steps every time!
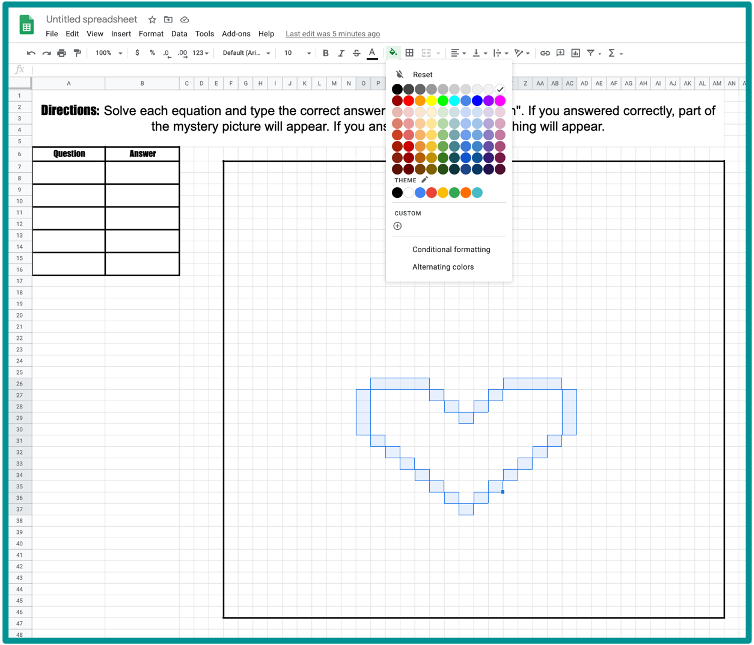
3. Draw the pixel art
In the square for the pixel art, start filling cells with different colors to draw the pixel art.
You can select multiple cells at a time by clicking on one, holding the control button (PC) or command button (MAC) and selecting others. Then use the paint bucket to color the cells.
Drawing the picture might be easy for you or super difficult (??♀️??♀️). There are plenty of examples online, but please don’t violate copyright!
Grab the free guide for more tips on drawing the picture and making it pretty!
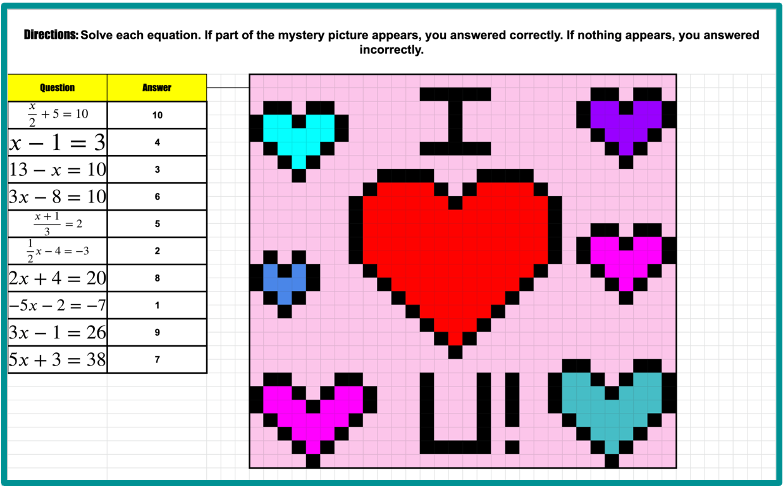
4. Add questions
Now it’s time to add our questions! A few tips on questions:
•Use the extension EquatIO for easy-to-read math text
•Make sure every question has a DIFFERENT answer
•You can have numerical or text answers (download the free guide here for more about types of answers)
5. Add conditional formatting
Now we need to add the conditional formatting that makes the picture appear as students type answers.
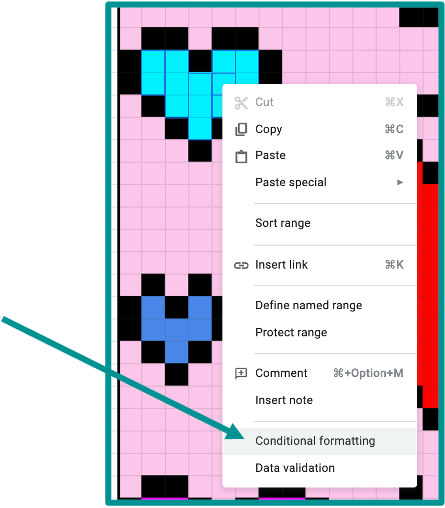
First, select a group of pixels from the picture that are all the same color. To select multiple cells, press and hold the control (PC) or command (MAC) button.
Next, while the cells are selected, right click and select conditional formatting.
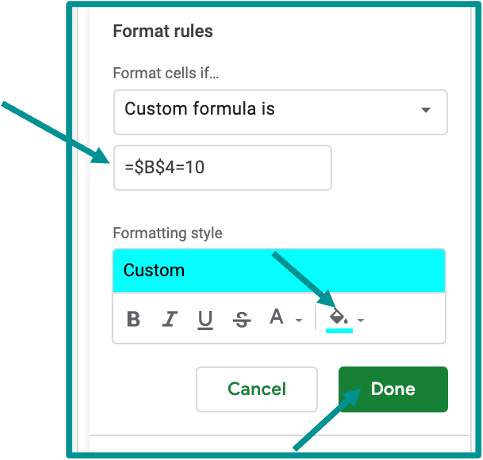
A box will open at the right side of your spreadsheet. Under “format rules” choose “Custom formula is” from the drop-down menu.
You will type a formula that contains the cell where the correct answer will go. On my example, the first answer goes in cell B4. The answer that should go in B4 is 10. So my formula will be:
=$B$4=10
Under formatting style, I will select the color bright blue because that is the color I have selected on my picture.
Then click done.
While you still have the blue pixels highlighted, change them all to white. That helps you remember you have already formatted those cells.
Now, repeat this process with another group of pixels that are the same color.
Continue to do this until the entire picture is white (so you know all the pixels have been formatted).
That’s it!
And that’s it! Remember, my printable guide has more details, pictures, and super useful info! Grab it here!
Now you can share with your students via Google Classroom or a link!
I hope that helps! If you make pixel art, please leave me a comment or let me know on Instagram @LindsayBowden. I love connecting with teachers!
Creating engaging resources doesn’t have to stop here! Head to LindsayBowden.com/Training to sign up for my FREE training on creating engaging math resources!
You may also like:
• 5 Steps to Make Your Own Math Resources
•How to Make Digital Worksheets
![]()