Converting PDF worksheets into digital worksheet is a super easy and useful skill! With so many schools offering 1-to-1 learning, digital worksheets are becoming more popular.
In this post, I’ll show you how to take a PDF worksheet and convert it to a digital worksheet for your students to complete. I’ll also show you how to assign it in Google Classroom™ or with a link or email.
1. Save your PDF worksheet as an image
First, you want to save your PDF worksheet(s) as an image. You don’t want to take a screen shot or use the snipping tool because it will be blurry.
Using Adobe Reader
To save as an image, you can try exporting it using Adobe Reader. Click File-> Export to–>Image–> JPEG. Some PDFs may not allow you to do that because of the security settings.
If that’s the case, make sure that saving the worksheet as an image abides by the Terms of Use for the worksheet creator. Most worksheet creators don’t mind if you upload their worksheet to a password-protected website like Google Classroom™.
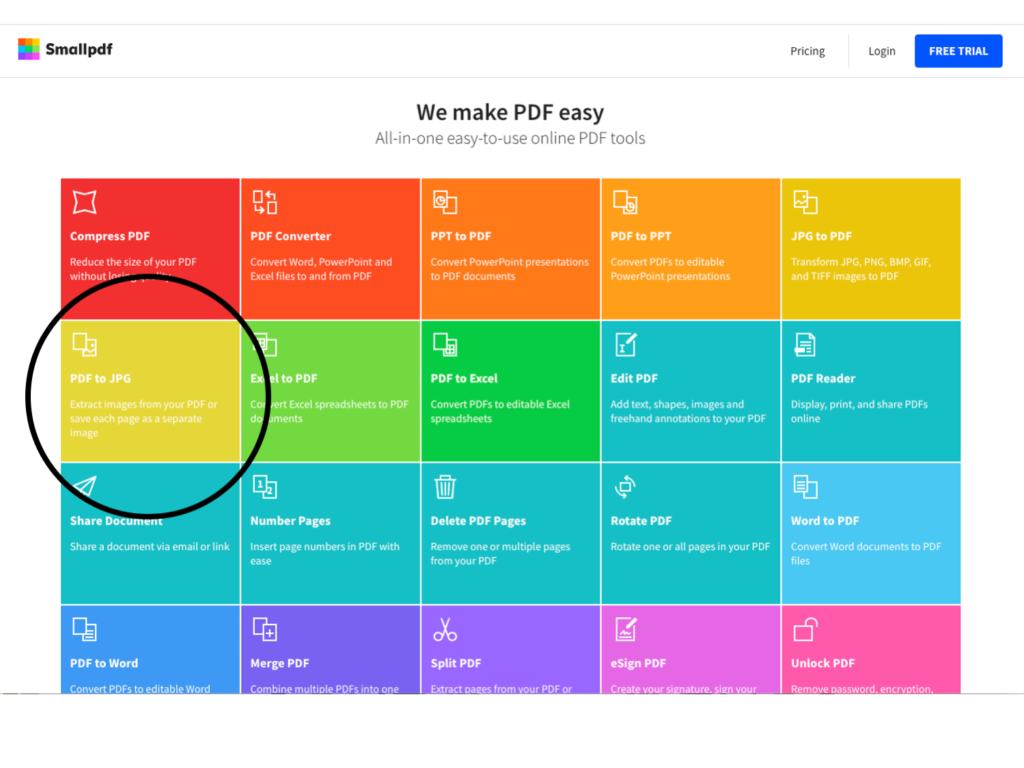
Using SmallPDF.com
Once you are sure that you’re abiding by the terms of use, you can use this website to convert any PDF to an image. First, click PDF to JPG.
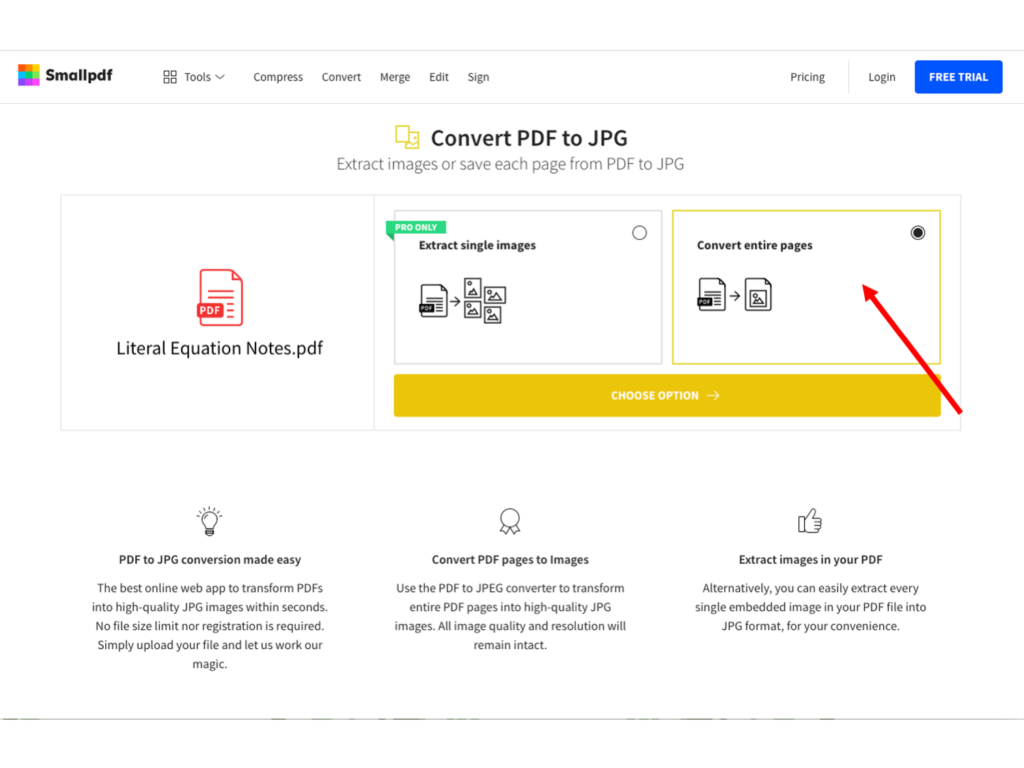
Then upload the PDF you want to convert. Click “Convert entire pages”.
Next, click “Download”. The images will download to your computer in a .zip file (if there is more than one image).
Extract the .zip file and save it to your desktop. (For PC users, right click and select Extract All. For MAC users, double click the .zip file.)
2. Upload the image to Google Slides™
Once you have the worksheet(s) saved as images, go to Google Slides and open a new presentation.
Change the slide size to letter size (8.5″ by 11″)
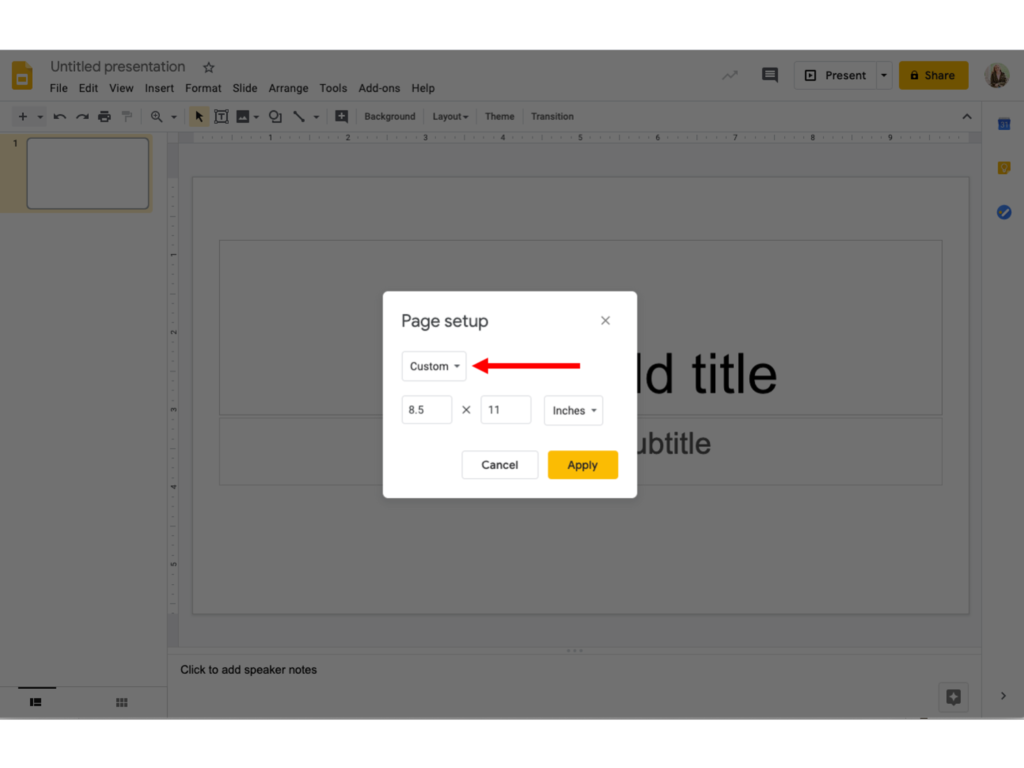
First, you want to adjust the slide size so that it matches your worksheet. Most worksheets are letter size (8.5″ by 11″).
Go to File–> Page Setup–>Custom and type 8.5 by 11. Click apply. Then delete the two text boxes that are pre-populated on the slide (click them and press delete on your keyboard).
Change the background of the slide to the worksheet image
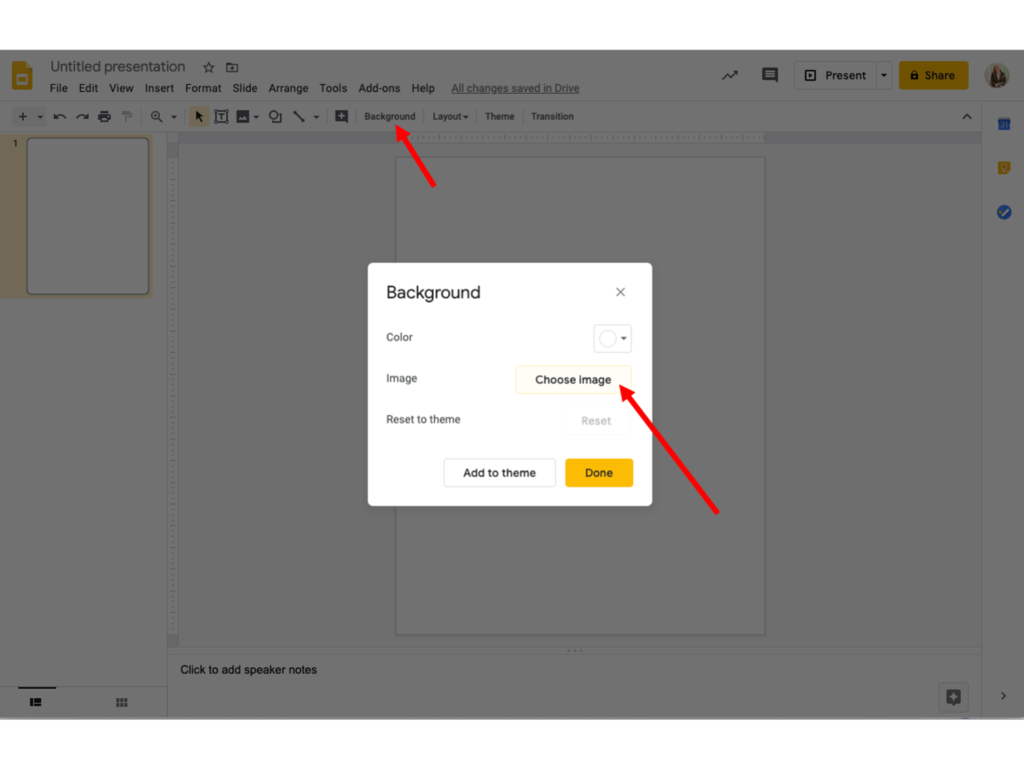
Next, click Background–>Choose Image and select the worksheet image from your desktop.
You want to set the image as the background so that it will “lock” and students can’t move it.
3. Add text boxes for students
Now, you want to add text boxes for students to type the answer.
Click Insert–>Text Box. Click and drag to create a text box. I like to type in the text box exactly what I want students to do to avoid confusion (example: Type answer #1 here).
You can duplicate text boxes using Command+D (MAC) or Control+D (PC). Duplicate as many text boxes as you need. I use a new text box for each problem.

4. Assign via Google Classroom™, link, or email
Once you have text boxes added, you’re ready to assign the worksheet to your students!
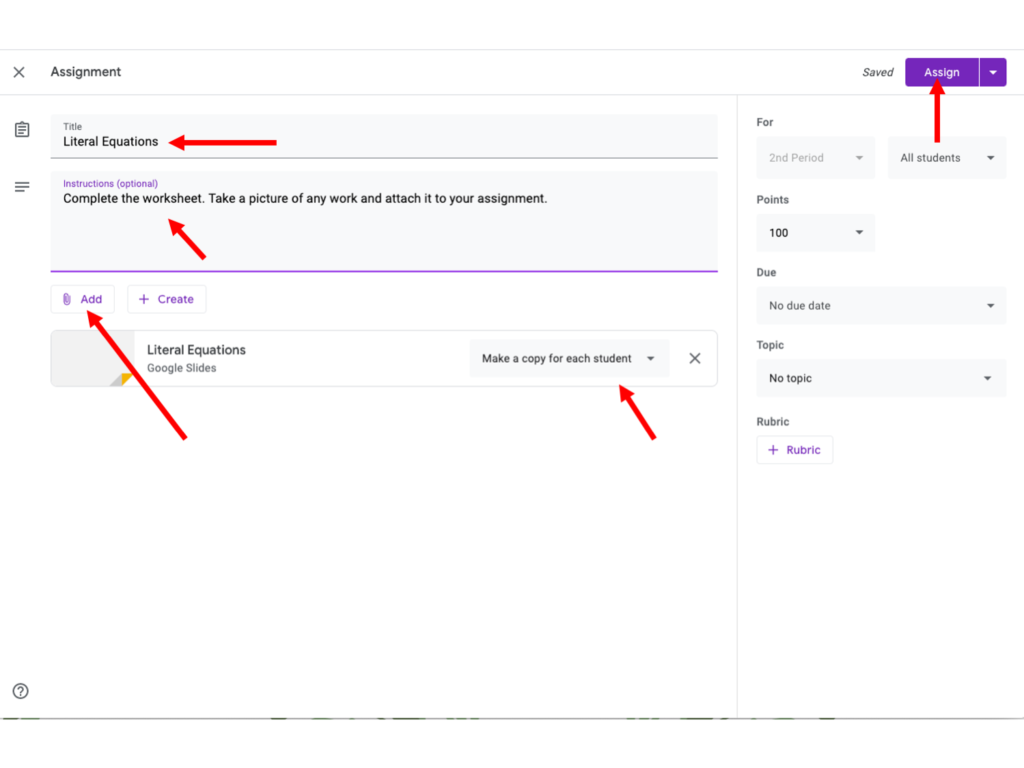
First, you want to title your worksheet in the upper left-hand corner.
If you are using Google Classroom™, make sure you create the worksheet on the same account as your Google Classroom account. If you didn’t, you can always share it to another Google Drive™.
Assign in Google Classroom
In Google Classroom, click Classwork–> Create–> Assignment. Add a title and instructions.
Click the Add (with the paperclip) and select Google Drive. Select Recent. The worksheet should be the first presentation you see. Select it and click “Add”.
Make sure you select “Make a copy for each student” in the drop-down menu!
Adjust the due date, points, and class periods. Click assign.
Assign with link or email
To share the worksheet via email or a link, click Share in the upper right-hand corner from the Slides presentation.
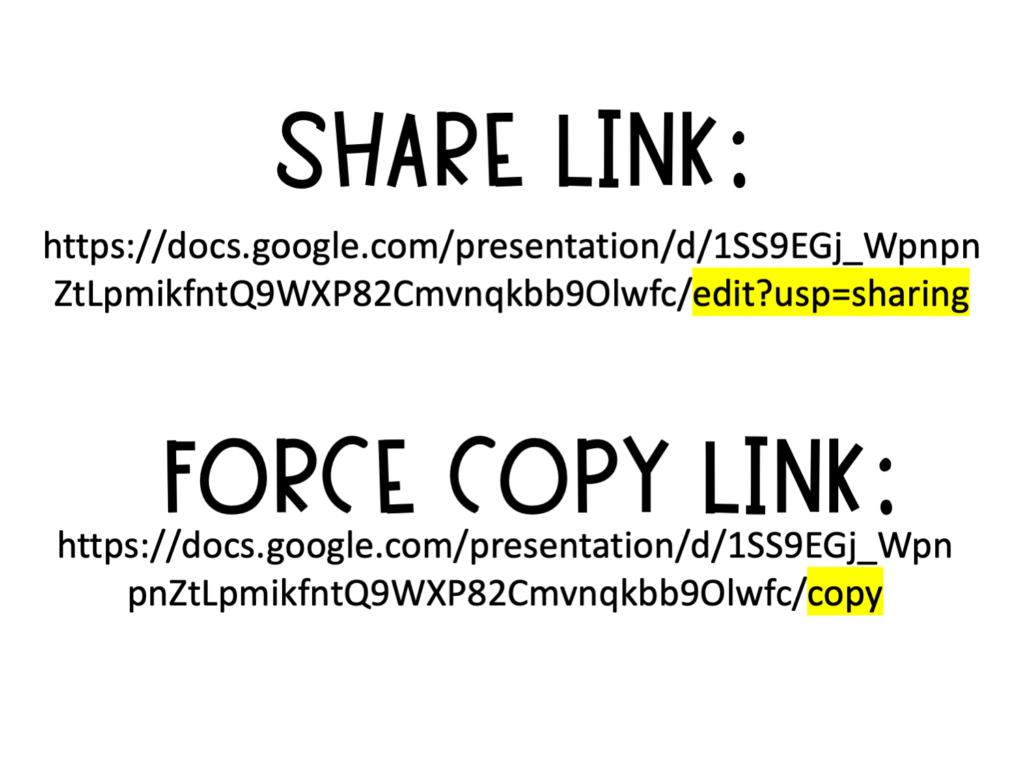
Click “Get shareable link”. Change the settings to “Anyone with a link can edit”. Copy the link.
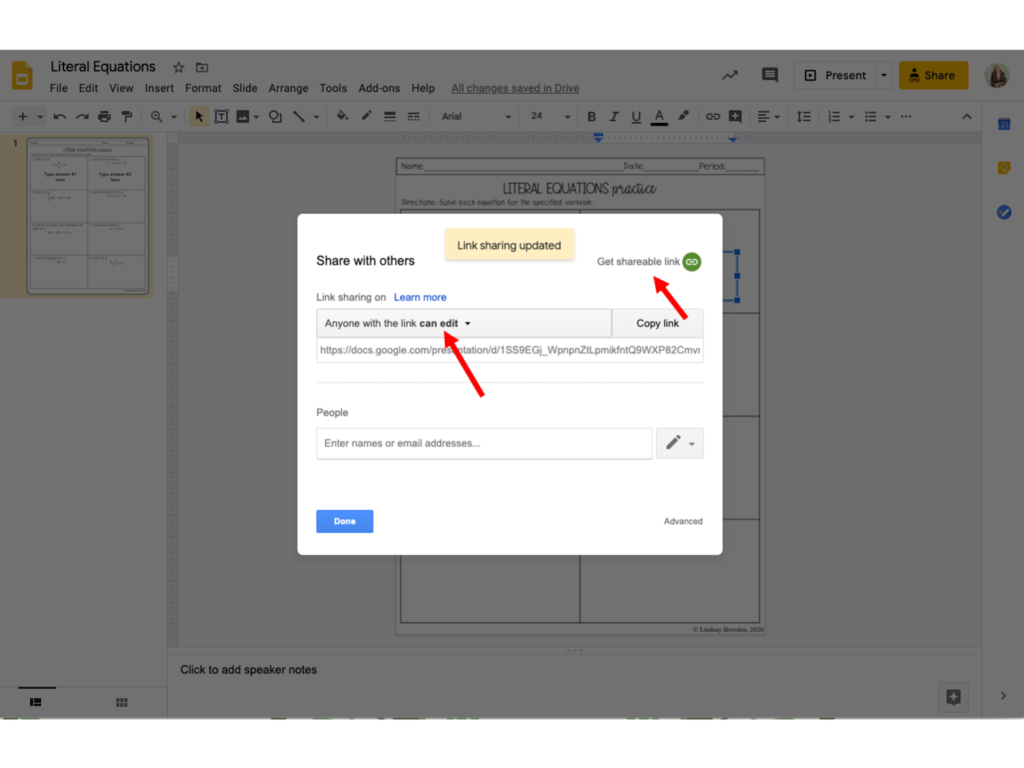
THIS IS REALLY IMPORTANT: Take the link and paste it to Word or your Notes. Change the ending “edit?usp=sharing” to “copy”. This will create a force copy link. That way, when students open the link, they are forced to make a copy. Otherwise, they will edit your original!
Now, you can share the force copy link with your students by emailing it to them or sharing the link on an online learning management system (like Canvas or Schoology).
Now you’re ready to start creating digital worksheets! Creating engaging resources doesn’t have to stop here. Head to LindsayBowden.com/Training to sign up for my FREE training on creating engaging math resources!
You may also like:
- How to Insert Math Equations into Google Forms™
- How to Make Digital Task Cards
- 5 Reasons You Should Be Making Your Own Math Worksheets