Have you been wondering how to make a quiz in Microsoft Forms for your math students? Digital quizzes can save you so much time because they are self-checking and you can distribute them to your students easily!
In this blog post, I’ll show you how to get started making a quiz in Microsoft Forms. I’ll also show you how to share the quiz you created with your students or colleagues.
You will need to make sure you have an Office 365 account before you get started. If your school uses Microsoft, you can use your school email.
Step 1: Set up your form
Go to https://forms.office.com and log in using your Office 365 account information.
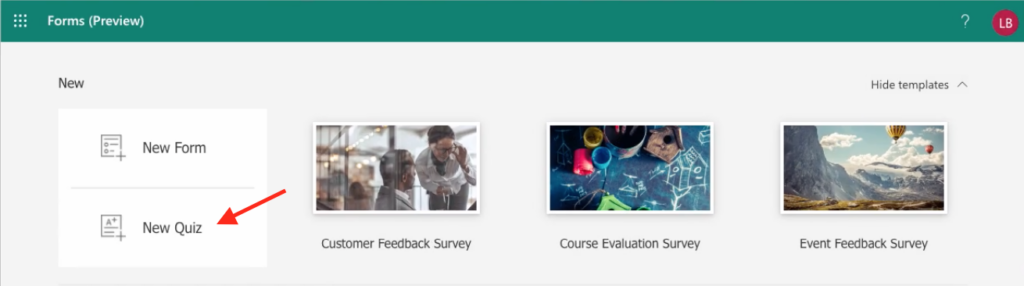
Click “New Quiz” to create a form that will be self-grading.
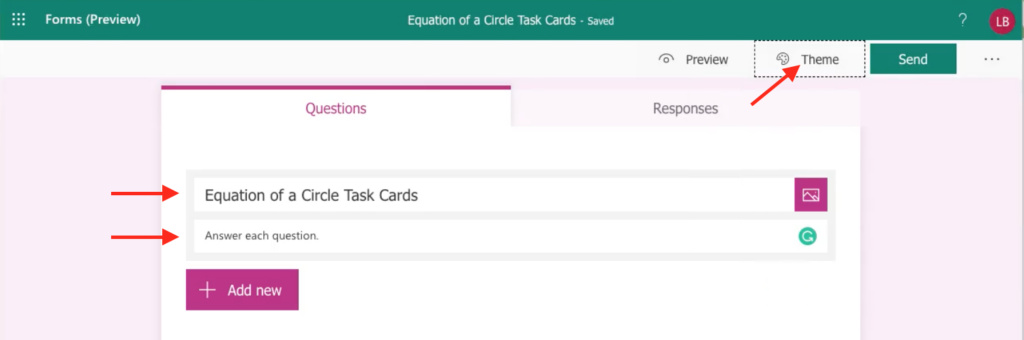
Change the form title and add directions for your students. You can also change the theme of your form if you wish.
Step 2: Insert questions and answers
Click “+ Add new” and choose the type of question you would like to add. You can choose from multiple choice, short answer, or survey questions.
Type a question or add an image with the question you want your students to answer. Add answer choices if you have chosen a multiple choice question. Select the correct answer choice by clicking the check mark on the right side of the correct option.
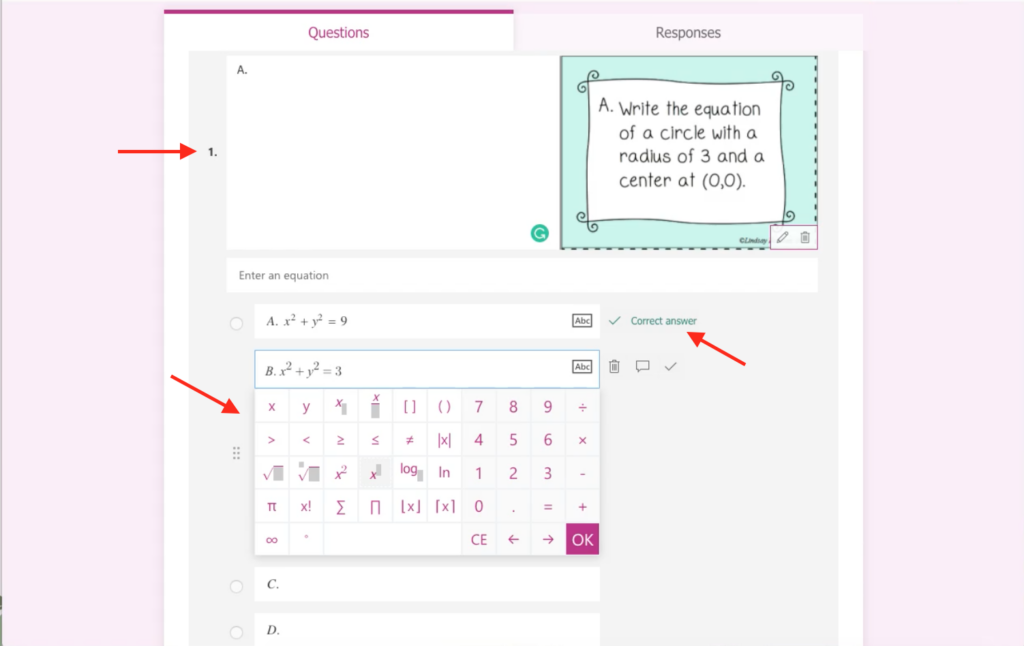
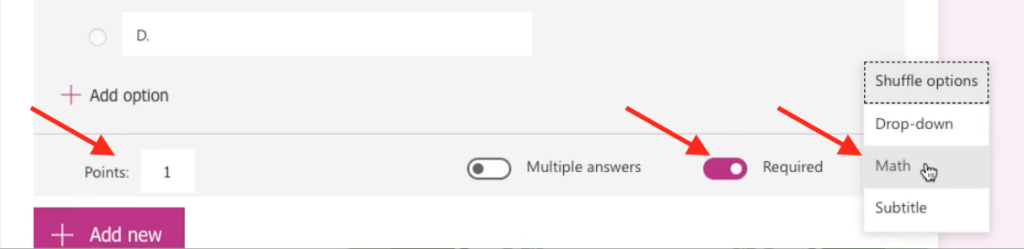
Microsoft has a built-in equation editor that you can use for your answer choices. To open the equation editor, select the three dots below the answer choices and choose “Math”. The equation editor will appear as you begin typing your answers when this is selected.
You can also edit the point value of the question and make it required for your students to answer if you wish.
Repeat these steps for each question on your quiz.
Step 3: Share your quiz
Once you have finished creating your quiz, you will need to share it with your students and/or colleagues.
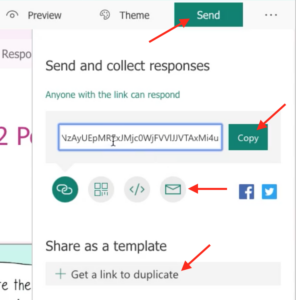
To send the quiz to someone, click the “Send” button in the top right corner of the screen.
Students
For your students, you will choose from the settings under “Send and collect responses”. This will allow students to respond to the questions and you will be able to see their answers.
You can click the “Copy” button and paste the link wherever your students will be able to access the quiz. You can also share with your students by giving them a QR code, embedding the quiz to a class website, or sending them an email directly. Choose whichever option works best for your classroom.
Colleagues
To share the quiz with a colleague, you will need to allow them to duplicate the quiz so they can see the responses from their own students. Under the “Share as a template” section, you will click “+ Get a link to duplicate” and click the “Copy” button. You can paste this link anywhere that a colleague can access it.
When your colleague clicks the duplicate link, they will be prompted to make a copy of the quiz so they can share with their students and have access to their responses.
Want to learn more?
I hope this information was helpful! Knowing how to make a quiz in Microsoft Forms can make it so easy to give your students a self-checking assessment, which saves you time! If you want to learn more about how to make other types of digital activities, sign up for my free training here!