Do you want to make Google Forms for your students but aren’t sure where to start? Google Forms are a great tool for creating self-checking assessments!
In this blog post, I’ll show you the basics of creating a Google Form as a self-checking assignment. I’ll also give you a couple of resources to help with inserting math equations and symbols to your Google Form so your resources look professional and polished!
Step 1: Set up your form
Open Google Chrome and sign in to your Google account. Go to https://docs.google.com/forms and open a new blank form.
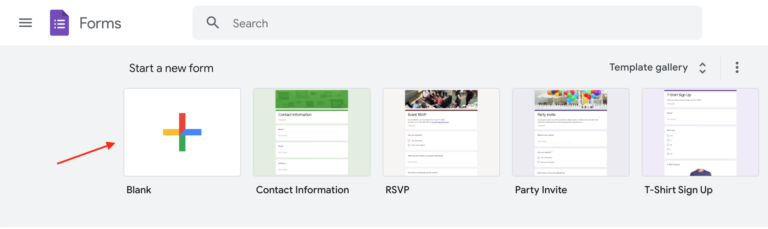
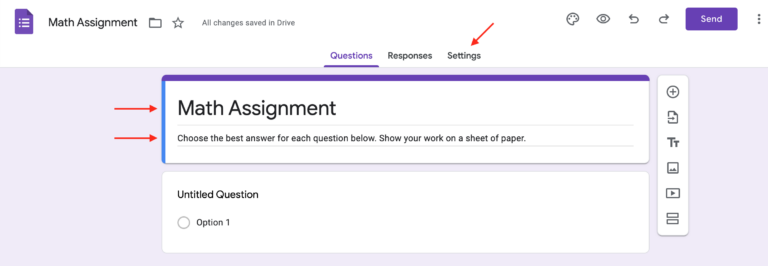
Change the form title and add a description so your students understand your expectations for the assignment. Then, click “Settings”.
Step 2: Adjust the settings
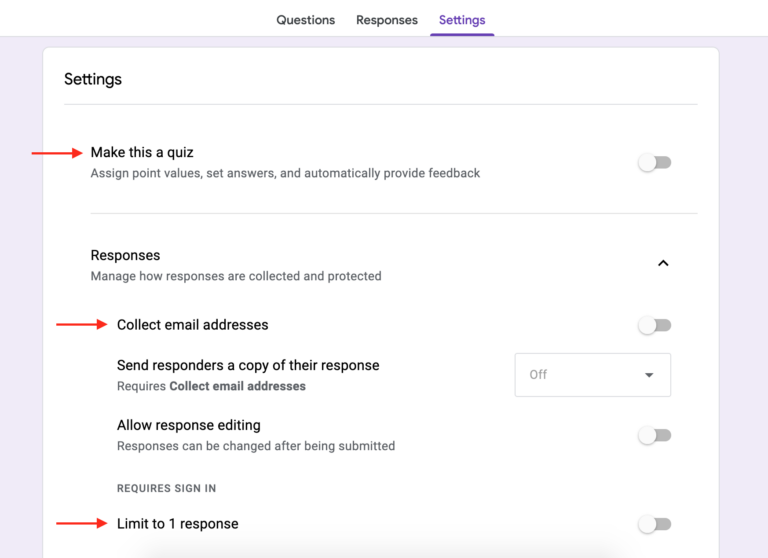
Under “Settings” you should select “Make this a quiz” if you want the assignment to be self-checking. You may also want to choose “Collect email addresses” or “Limit to 1 response” if this will be an assessment. Adjust any other settings as needed to make your assignment exactly how you want it!
Step 3: Insert questions and answers
Select the “Questions” tab at the top of the page and begin creating your assignment. The first question will already be populated.
You can either type your question into the text box or upload an image. You can also change the question type from multiple choice to short answer.
Make sure to select “Required” for each question so students have to give an answer before submitting the Google Form.
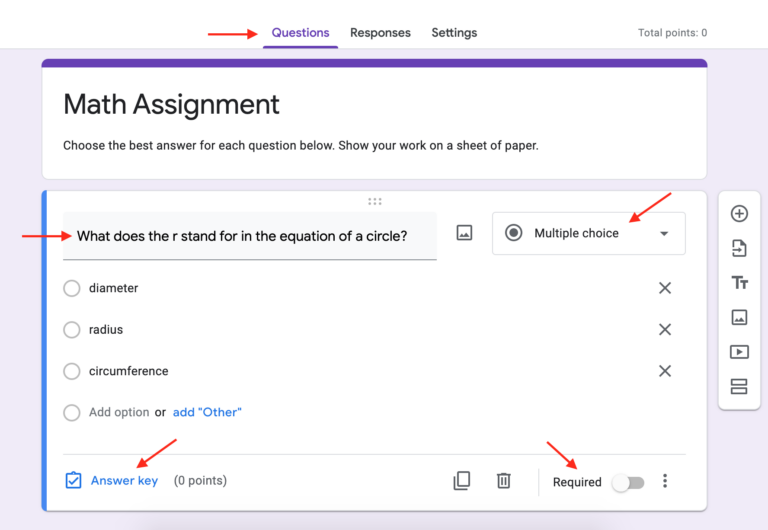
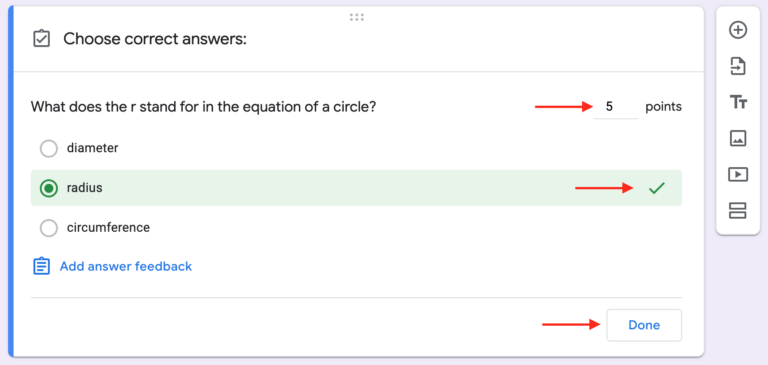
For a multiple choice question, fill in the answer options underneath the question. To make the assignment self-checking, select “Answer key” under the answer choices and choose the correct answer. You can also adjust the point value for the question. When you are finished, select “Done”.
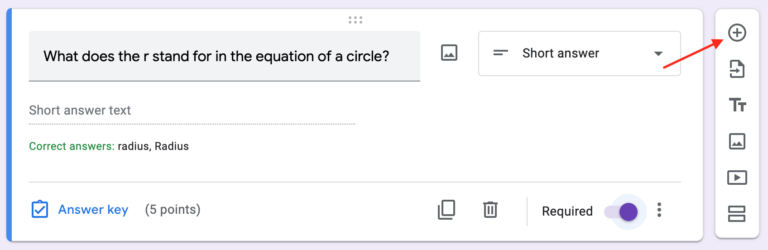
For a short answer question, you will type in your question or insert a picture the same way you would for a multiple choice question. For the assignment to be self-checking, you will need to input the correct answer on the answer key.
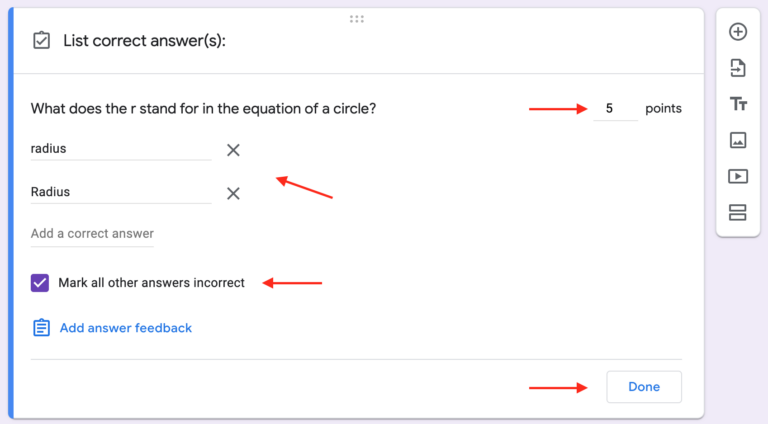
Choose “Answer key” underneath the question and type in the correct answer. You may want to include slightly different versions of the correct answer using upper and lower case letters or common misspellings.
Select “Mark all other answers incorrect” and adjust the point value as needed. When you are finished, select “Done”.
To add another question, select the plus sign on the toolbar on the right hand side of your screen. Then, repeat the steps above for each question.
Step 4: Share your assignment
When you are finished creating your assignment, you can add it to Google Classroom or send your students a link to access the form.
To get the link for the assignment, click “Send” in the top right hand corner of your screen. Then, choose the link icon in the middle of the “Send form” box. Click “Copy” to copy the link to your clipboard and paste it anywhere you want your students to access it.

Bonus Resources
Some extra tools that could be helpful when you make Google Forms for your math classroom are EquatIO and CodeCogs. These tools will allow you to insert equations and math symbols to your Google Form assignments.
EquatIO
EquatIO is great for inserting equations and symbols directly into your Google Forms. You will need to download it to your computer and add it as an extension on your Google Chrome browser.
Go to https://www.texthelp.com/products/equatio/ and download EquatIO to your computer. Once you download it, add it to your Google Chrome extensions. It may take a couple of days for EquatIO to register on your Google Chrome account. Once it fully registers in Chrome, you will see blue icons appear on your Google Forms that you can use to insert equations.
CodeCogs
CodeCogs does not require a download to your computer, so if you want to avoid that step, it would be your best option! You will not be able to insert equations and symbols directly from your Google Form, but it is very simple to add them to your assignment from the CodeCogs website.
Go to https://editor.codecogs.com/ and type your equation in the box provided. Make sure your equation appears correctly in the image below the box where you are typing. Grab the URL link from the bottom of the page and copy it. Go back to your Google Form and choose “Add image” wherever you would like to insert the equation. In the “Insert image” box, choose “BY URL”, and paste the URL you copied from CodeCogs.
For more detailed information about using EquatIO or CodeCogs, check out this blog post!
Want to learn more?
I hope this information was helpful! Google Forms are such a great tool for creating self-checking assignments for your students. If you want to learn more about how to make Google Forms or other types of digital activities, sign up for my free training here!